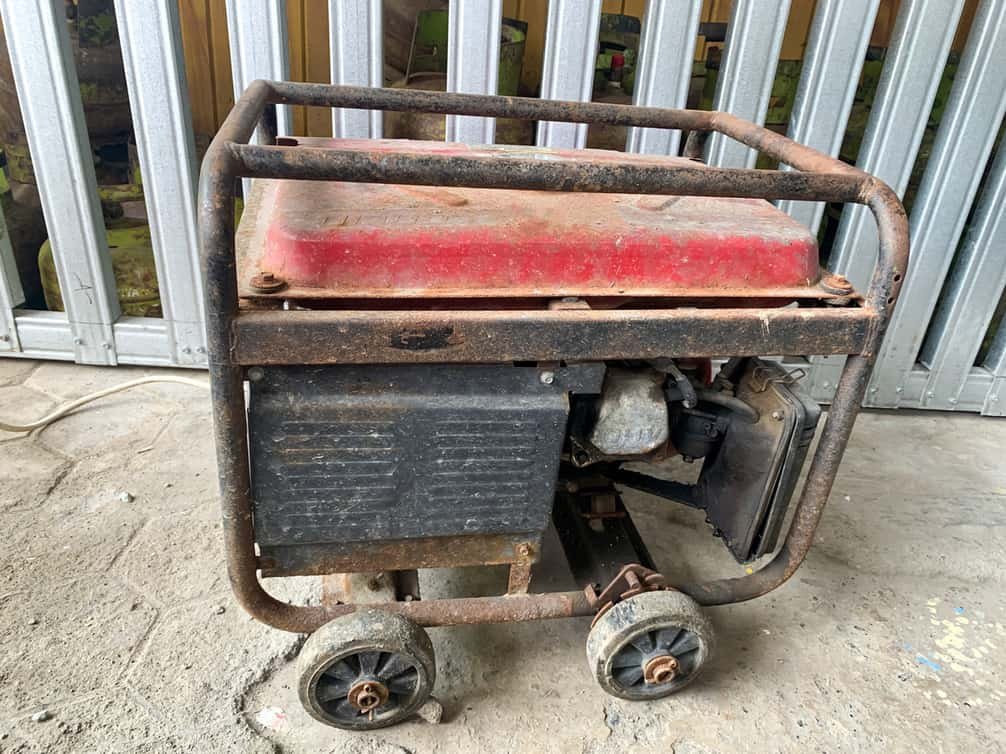
Few things are as reassuring as a reliable 10kW generator kicking on when the grid goes dark. It’s your family's shield against power outages, keeping lights on, food fresh, and essential systems running. But that peace of mind isn't automatic; it's earned through consistent 10kW generator maintenance and knowing how to troubleshoot common issues when they arise.
Think of your generator like a silent guardian, waiting in the wings. For it to perform flawlessly in a crisis, it needs regular attention. Skimping on maintenance not only risks a failure when you need it most, but it can also shorten the lifespan of your valuable investment.
At a Glance: Your 10kW Generator's Health Check
- Annual Tune-Up is Key: Follow a yearly maintenance schedule, even if your generator hasn't run much.
- Don't Ignore Warning Lights: A flashing yellow LED or an alarm code isn't just a suggestion; it's a call to action.
- The Big 3 Checks: Always inspect your battery, fuel system, and oil levels first when issues arise.
- Keep Records: Document all maintenance, run times, and any service performed.
- Know Your Limits: Many troubleshooting steps are DIY-friendly, but complex electrical or engine repairs are best left to a certified professional.
Why Regular Maintenance is Your Power Lifeline
You wouldn't run your car for years without an oil change, and your generator deserves the same respect. Home standby generators, whether they're 10kW or larger, are sophisticated machines designed to deliver power on demand. This incredible capability relies on many interconnected systems working in harmony.
Generac, for instance, specifically designs its Next Generation Series and Guardian Series (which include popular 10-28 kW air-cooled models) for yearly maintenance. A yellow maintenance light will typically appear annually from the generator's activation date, signaling that an inspection is due. This light is a prompt, not a showstopper – it won't prevent your unit from running during an outage, but ignoring it increases your risk. Similarly, a flashing yellow LED on a Generac Next Generation series indicates an active warning or required maintenance.
Regular maintenance isnps:
- Ensures Reliability: A well-maintained generator is far more likely to start and run effectively during an actual power outage.
- Extends Lifespan: Proactive care prevents small issues from escalating into costly repairs, maximizing your generator's operational life.
- Maintains Warranty: Most manufacturers require documented maintenance for warranty claims. Keeping detailed records, perhaps using an app like Mobile Link for Generators, is crucial.
- Optimizes Performance: Clean filters, fresh oil, and a healthy battery mean your generator will run more efficiently and deliver stable power.
- Safety First: Regular inspections can uncover potential hazards like fuel leaks or corroded wiring before they become dangerous.
While some basic tasks can be performed by homeowners (as outlined in your owner's manual), many prefer to contact a local certified service dealer. Either way, the goal is the same: keeping your power on. If you're looking for more information on selecting the right unit for your needs, be sure to check out Our 10 kW generator guide.
Your Annual 10kW Generator Maintenance Checklist: Step-by-Step
Performing regular maintenance is an investment in your peace of mind. Here’s a comprehensive checklist, drawing on best practices from leading manufacturers like Generac and Briggs & Stratton, to keep your 10kW generator in peak condition.
1. The Initial Visual Walk-Around
Before you even think about tools, give your generator a thorough once-over.
- Inspect for Water Intrusion: Check the enclosure for any signs of leaks, standing water, or moisture accumulation. Ensure all vents are clear and unobstructed.
- Look for Corrosion: Examine all visible metal parts, electrical connections, and the battery terminals for rust, green powdery buildup, or other signs of corrosion. Address any minor corrosion with a wire brush and corrosion-inhibiting spray.
- Check for Pests: Generators can make cozy homes for rodents and insects. Look for nests, chewed wires, or blockages in air intakes and exhaust.
- Clear Debris: Remove leaves, twigs, dirt, and any other debris from around and inside the generator enclosure. Ensure proper airflow is maintained.
- Perform a Fuel System Leak Test: Visually inspect all fuel lines, connections, and the regulator for any signs of leaks, cracks, or deterioration. A slight odor of fuel could indicate an issue.
2. Battery Health: The Heartbeat of Your Start System
A weak battery is the number one cause of "no-start" issues. Your generator battery is always being charged by a trickle charger, but it can still degrade over time.
- Check Battery Voltage: Use a digital multimeter. A fully charged 12V battery should read around 12.6V or higher. If it's below 12V, especially below 9.6V, it needs charging or replacement.
- Inspect Terminals and Connections: Ensure terminals are clean, tight, and free of corrosion. Loose or corroded connections can prevent the generator from cranking.
- Look for Physical Damage: Inspect the battery casing for cracks, swelling, discoloration, or leaks. Any of these signs mean the battery needs replacement.
- Fluid Level (if applicable): For non-sealed batteries, check the electrolyte levels and top off with distilled water if needed.
3. Fuel System Integrity: Keeping the Engine Fed
Whether your 10kW generator runs on natural gas (NG) or liquid propane (LP), a healthy fuel system is crucial.
- Verify Fuel Supply: Ensure the main fuel valve (for LP or NG) is open and there's sufficient fuel in the tank (for LP). A common oversight is a closed valve!
- Check Fuel Line Condition: Look for cracks, kinks, or deterioration in fuel lines.
- Inspect Regulator: Ensure the fuel pressure regulator is in good condition and not leaking.
- Fuel Type Configuration (Briggs & Stratton Specific): If you've ever converted your generator's fuel type, ensure the controller's fuel profile is correctly set (this often requires a dealer password for Briggs & Stratton units).
- Professional Fuel Pressure Check: While homeowners can't typically perform this, a technician will use an analog manometer to measure supply pressure at the test port (e.g., 11-14 inches WC for LP, 3.5-7 inches WC for NG). This ensures adequate fuel delivery under load.
4. Oil and Oil Filter Service: The Engine's Lifeblood
This is arguably the most critical maintenance task for engine longevity.
- Timing is Everything:
- Initial Break-in: Change oil after the first 25 hours of run time (or 20 hours for some smaller units).
- Regular Interval: Then, every 200 hours of run time since the last change.
- Extreme Environments: If your generator operates in temperatures below 40°F (4.4°C) or above 85°F (29.4°C), change oil and filter every 100 hours.
- Time-Based: At minimum, change engine oil every 2 years, regardless of run hours.
- Check Oil Level: Ensure the oil level is between the "add" and "full" marks on the dipstick. Incorrect levels can lead to starting issues or engine damage. For Briggs & Stratton 12-13kW units, expect around 42-45 oz; 17-26kW units around 78-80 oz.
- Recommended Oil: Generac recommends its 5W-20 full synthetic oil for all home standby generators, regardless of temperature. Briggs & Stratton often recommends API SJ/CF 5W-30 synthetic oil. Always consult your owner's manual for the specific type and viscosity for your model and climate.
- How to Change: Drain the old oil (ensure the engine is warm but not hot), replace the oil filter, and refill with new, recommended oil to the proper level.
5. Air Filter Inspection and Replacement
A clean air filter ensures your engine gets the oxygen it needs for efficient combustion.
- Inspect Condition: Check the air filter for dirt, dust, debris, or any signs of damage. A clogged filter restricts airflow, impacting performance.
- Replace as Needed: If the filter appears dirty or damaged, replace it according to your owner's manual. A general guideline is annually, or more frequently in dusty environments.
6. Spark Plug Examination and Gapping
Healthy spark plugs are essential for proper ignition.
- Remove and Inspect: Carefully remove the spark plugs. Look for signs of fouling (carbon buildup), oil residue, or electrode wear.
- Check Gap: Use a spark plug gapping tool to ensure the gap is set to the manufacturer's specification (e.g., 0.020 inches for Briggs & Stratton 12-13kW; 0.030 inches for 17-26kW PowerProtect models).
- Replace if Worn: If plugs are worn, fouled, or show signs of damage, replace them with the recommended type (e.g., Champion XC92YC or RC12YC).
- Torque Properly: Reinstall spark plugs and tighten to the specified torque (e.g., 180 in-lbs or 20 Nm for Briggs & Stratton).
7. Valve Clearance Adjustment (Professional Task)
While not a typical homeowner task, understanding its importance is key. Incorrect valve clearance can lead to poor performance or engine damage.
- When It's Checked: During a professional service, a technician will check and adjust valve clearance on a cold engine (e.g., Intake 0.004-0.006 inches; Exhaust 0.007-0.009 inches for Briggs & Stratton).
- Why It Matters: Proper clearance ensures valves open and close at the correct times, allowing for optimal compression and exhaust.
8. Post-Maintenance Check and Alarm Reset
Once maintenance is complete, it's vital to confirm everything is in order.
- Clear Alarms: Follow your specific generator's procedure to clear any maintenance or warning alarms. For Generac units, this ensures the home standby unit is in a "Ready to Run" status.
- Test Run: Perform a manual test run to ensure the generator starts, runs smoothly, produces power, and then shuts down correctly. Listen for unusual noises.
- Document Everything: Record the date, what was serviced, run hours, and any parts replaced. This helps track future maintenance and warranty compliance.
Troubleshooting Common 10kW Generator Issues: Keeping Your Power On
Even with diligent maintenance, issues can arise. Knowing how to systematically troubleshoot can save you time and money. Always remember safety first: exercise caution when working with electricity or fuel. If you're unsure, or dealing with complex electrical components, always call a qualified service professional.
1. Generator Won't Start: Silence When You Need Noise
This is perhaps the most frustrating issue. Let's break down why your generator might not crank or might crank but fail to ignite.
Symptom: Engine Does Not Crank
The engine makes no attempt to turn over.
- Potential Causes & First Steps:
- Weak/Failed Battery or Connections:
- Check: Is the battery terminal corroded or loose? Is the battery physically damaged (melted posts, discoloration, leaks)?
- Action: Clean and tighten terminals. Check battery voltage (should be >9.6 VDC at minimum; ~13.5 VDC with charger on). If below 10V, charge or replace. A load test can confirm battery health.
- Blown Fuses:
- Check: Your generator will have a main DC fuse (often 15 amp).
- Action: Inspect and replace if blown.
- Emergency Stop Button:
- Check: Has the E-Stop button been accidentally pressed?
- Action: Twist or pull to reset. Ensure its wiring is intact.
- Controller in MANUAL/Engine Off Mode:
- Check: Is your generator's controller set to "AUTO" mode?
- Action: Change to "AUTO." If it's in MANUAL or Engine Off, it won't respond to power outages.
- Battery Charger Issue:
- Check: Is your generator's battery charger working? Measure DC voltage at the controller's battery input pins (e.g., pins 1 and 2 for Briggs GC-1030) – you should see charger voltage.
- Action: If charger isn't providing voltage, it may need repair or replacement.
Symptom: Engine Cranks But Does Not Start
The engine turns over, but it doesn't catch and run. This points to issues with fuel, air, or spark.
- Potential Causes & First Steps:
- Incorrect/Insufficient Engine Oil Level:
- Check: Is the oil level correct on the dipstick? Some generators have low oil sensors that prevent starting.
- Action: Add recommended oil if low.
- Incorrect/Insufficient Fuel Pressure/Delivery:
- Check: Is the main fuel valve open? Is there LP in the tank? Are fuel lines clear?
- Action: Verify fuel supply. If the engine briefly catches and dies, it's often a fuel supply issue. If you suspect an issue with the fuel solenoid (which opens to allow fuel flow), a professional can measure voltage while cranking (should be >9.6 VDC) and its coil resistance.
- Clogged Air Filter:
- Check: Is the air filter clean?
- Action: Inspect and replace a dirty air filter.
- Bad Spark Plugs/Wires:
- Check: Have you inspected and gapped your spark plugs recently? Are the spark plug wires securely attached and free from damage?
- Action: Use an ignition tester on the spark plug wires to confirm spark. Replace plugs if worn or fouled.
- Engine Valve Adjustment Needed (Professional Check):
- Check: If your generator has high run hours or has always run poorly, incorrect valve clearance could be a culprit.
- Action: This requires a professional technician to measure and adjust.
2. Generator Starts and then Shuts Down: The Brief Hope
This means the engine can run, but something is causing it to stop.
Symptom: Runs for ONLY 10 Seconds
Often linked to electrical or speed sensing issues.
- Potential Causes & First Steps:
- Undersized Fuel Line/Insufficient Fuel Pressure:
- Check: Does the generator run normally on a manual test, but then dies quickly under load? The fuel line might not be able to deliver enough fuel volume.
- Action: A professional can check fuel pressure dynamically.
- Low/High Generator Voltage Output:
- Check: Does the generator try to produce power but shuts down quickly? This can be an Alternator Voltage Regulator (AVR) issue or an engine speed problem.
- Action: A technician will measure the output voltage (expect ~240 VAC) at the circuit breaker. Errors like "AVR Fault" or "Low Voltage" indicate this.
- Generator Overspeed/Underspeed:
- Check: Is the engine's RPM stable at 3600 RPM (for 60Hz)?
- Action: Controller alarms like "Over Speed" or "Under Speed" will indicate this. This could point to a governor issue or a faulty speed sensor.
Symptom: Runs for LONGER than 10 Seconds, then Shuts Down
These are typically protection-related shutdowns.
- Potential Causes & First Steps:
- Low Oil Pressure Switch:
- Check: Has the oil level dropped since it last ran?
- Action: Check the oil level immediately. If the engine is running, an "Low Oil Pressure Switch" alarm indicates the engine's oil pressure has fallen below a safe threshold (typically 7-10 psi). This could be due to low oil, a clogged oil filter, a faulty pressure switch, or a more serious engine problem.
- High Engine Temperature Switch:
- Check: Is the generator overheating? Is the enclosure blocked, or are cooling fins clogged?
- Action: Check for debris blocking air intake/exhaust. Ensure the engine's foam seals (e.g., around the air cooling fan) are intact. A "High Engine Temperature Switch" alarm typically triggers around 300°F (149°C).
- Improperly Sized Generator for Load Demand (Over Current/Load):
- Check: Were you running too many appliances when it shut down?
- Action: Reduce the load. If this happens frequently, your generator might be undersized for your needs, or there could be an electrical short in your home. A technician can use an amp clamp to measure actual load.
- Blocked Air Intake:
- Check: Is the air filter heavily clogged?
- Action: Replace the air filter. This can cause the generator to starve for air, leading to poor combustion and shutdown.
3. Generator Runs Rough: Not a Smooth Ride
A rough-running generator is inefficient and can cause further damage.
- Prioritize Fuel and Output Voltage Checks: Revisit the fuel pressure checks (is there steady fuel delivery?) and ensure output voltage is stable (is the engine speed fluctuating too much?).
- Engine Troubleshooting Actions:
- Cylinder Balance (Professional Check):
- Check: A technician can use ignition testers and a tachometer to check for significant RPM differences between cylinders, indicating an issue with a specific cylinder (e.g., spark, fuel injector, compression).
- Action: This requires specialized tools and expertise.
- Crankcase Vacuum:
- Check: A technician might measure crankcase vacuum (-5 to -10 inches WC expected). Abnormal readings can indicate engine wear or internal issues.
4. Generator Does Not Produce Voltage: All Sound, No Power
The engine runs fine, but no electricity is being generated.
- Troubleshooting Order:
- Basic Voltage Checks: Using a multimeter, measure 240 VAC at the load side of the circuit breaker and at the controller's output pins (e.g., Briggs GC-1030 pins 29/30). If voltage is absent, move to the line side of the breaker.
- Test Field Flash (Professional Task): The generator needs an initial "field flash" (a small DC voltage) to energize the alternator. Sometimes, this system fails.
- Test Alternator Wiring: This involves checking the resistance of the alternator's stator and rotor windings with a multimeter or megohmmeter. Values outside the manufacturer's specifications indicate a problem with the alternator itself.
- Perform AVR Bypass Tests (Professional Task): This advanced test involves temporarily supplying 12V DC directly to the alternator's rotor brushes to see if it generates voltage. This helps determine if the AVR (Automatic Voltage Regulator), stator, or rotor is faulty.
- Confirm Output Frequency: While the engine runs, verify the output frequency is 60 Hz. Incorrect frequency often points to engine speed control issues (electronic governor).
5. Generator Starts and Runs For No Reason: The Ghost in the Machine
If your generator starts up spontaneously, even with utility power present, it indicates a fault in its sensing system.
- Potential Causes & First Steps:
- Missing or Faulty Wires from ATS to Generator:
- Check: The generator relies on wires from the Automatic Transfer Switch (ATS) to sense utility power. If these wires (e.g., to terminals 25/26 for Briggs GC-1030) are damaged or disconnected, the generator might falsely assume a power outage.
- Action: Visually inspect the wiring.
- Utility ‘Sense’ Fuses Blown in ATS:
- Check: Your ATS likely has fuses that protect the utility sensing circuit. If these are blown, the ATS won't detect utility power.
- Action: On the GC-1030 Controller MAINS screen, check for "MAINS FAILED" status. Measure 240 VAC on both sides of the two transfer switch fuses. Replace blown fuses.
Decoding Your Generator's Alarms
Your generator's controller (like the Briggs & Stratton GC-1030 Series Controller) is a sophisticated diagnostic tool. It logs events and displays alarms that provide crucial clues. Don't just clear an alarm; understand what it's telling you.
Here are some common alarm types and their potential meanings, often found in your controller's Event Log (which typically stores up to 100 events, accessible via specific button sequences, e.g., on a GC-1030: STOP/CONFIG (Manual Mode) -> hold STOP/CONFIG (Configuration settings) -> press STOP/CONFIG (Read Mode) -> hold up and down arrows simultaneously).
- Battery Over/Under Voltage: Your battery voltage is too high (>15 VDC) or too low (<10 VDC). Check battery, charger, and connections.
- Fail to Start: The generator tried multiple times but couldn't ignite. Review "Engine Cranks But Does Not Start" section.
- Fail to Stop: The generator wouldn't shut down when commanded. This is often an issue with the shutdown solenoid or controller.
- High Engine Temperature Switch: Engine block got too hot. Check cooling airflow, debris, foam seals, and oil level.
- Low Oil Pressure Switch: Engine oil pressure dropped too low. Check oil level, oil filter, and the switch itself.
- Maintenance Due: It's time for your scheduled service. Don't ignore this!
- Over Current/Load: Too much demand was placed on the generator. Reduce load, or consider if your generator is undersized.
- Over/Under Frequency or Speed: The engine isn't running at the correct RPM to produce 60 Hz power. This points to governor or speed sensor issues.
- AVR Fault: The Automatic Voltage Regulator is not communicating with the controller or has failed. This will prevent power production.
- Emergency Stop: The E-Stop button is active or its wiring has an issue.
- Unbalanced Load: Indicates a significant difference in load between phases (if applicable to your generator). This can stress the generator.
Each alarm is a diagnostic breadcrumb. Refer to your specific owner's manual for a complete list of codes and detailed troubleshooting steps.
When to Call the Pros: Recognizing Your Limits
While much of the routine maintenance and basic troubleshooting is within reach for a diligent homeowner, there's a clear line where professional expertise becomes essential.
You should contact a certified generator service technician if you encounter:
- Persistent Alarms: You've followed troubleshooting steps, but an alarm keeps recurring.
- Electrical System Issues: Anything beyond checking fuses and basic battery voltage – especially issues with voltage output, AVR, or transfer switch wiring.
- Fuel System Leaks or Pressure Problems: Fuel is highly flammable. Leave any suspected leaks or complex fuel pressure diagnostics to professionals.
- Internal Engine Concerns: Issues like continuous rough running after basic checks, strange noises, valve clearance, or persistent low oil pressure.
- Alternator Malfunctions: If your generator runs but doesn't produce voltage, and basic checks don't reveal obvious causes, it's likely an internal alternator or AVR problem.
- Safety Concerns: If you smell gas, see sparks, or feel uncomfortable performing a task, stop and call for help.
Certified technicians have specialized tools (digital multimeters, analog manometers, ignition testers, digital tachometers, megohmmeters), diagnostic software, and the in-depth knowledge to safely and effectively diagnose and repair complex issues. They also carry the necessary replacement parts and can ensure your generator meets all safety standards.
Keeping Your Power On: Final Tips and Next Steps
Your 10kW generator is a critical piece of equipment designed to protect your home and family during emergencies. Treating it with the respect it deserves through regular maintenance and informed troubleshooting is the best way to ensure it's always ready for action.
- Read Your Manual: This cannot be stressed enough. Your owner's manual is your generator's specific bible for maintenance schedules, oil types, troubleshooting codes, and safety procedures.
- Create a Maintenance Log: Whether it's a notebook or a digital app, document every service, run hour, and repair. This builds a history that's invaluable for future troubleshooting and potential resale.
- Schedule Annual Professional Service: Even if you perform some DIY tasks, a yearly check-up by a certified technician ensures everything is optimized, caught early, and keeps your warranty valid. They can spot issues you might miss.
- Be Proactive: Don't wait for a power outage to test your generator. Run it weekly or bi-weekly for its exercise cycle and pay attention to its performance. Address small quirks before they become major failures.
- Invest in Quality Parts: When replacing oil, filters, or spark plugs, always use parts recommended by your generator's manufacturer to ensure compatibility and performance.
By following these guidelines, you're not just maintaining a machine; you're securing your home's resilience and ensuring that when the unexpected happens, your 10kW generator will be there, ready to keep the power on.